How to Stop Nails from Coming Out of the Ceiling (Easy Guide)
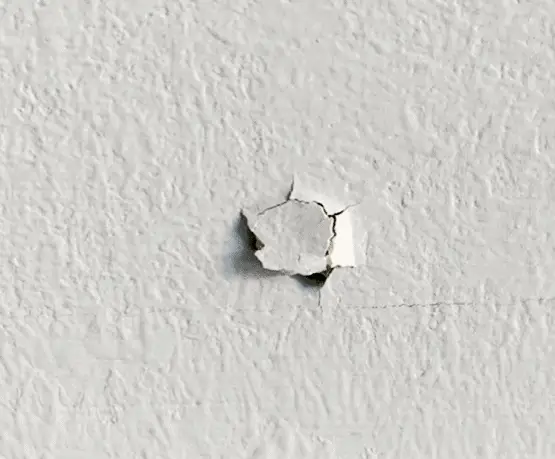
Older houses are more likely to have “nail pops,” . Nail pops are the term for nails coming out of the ceiling. This is more common in older houses that are structured with trusses rather than rafters, which most people are used to. When they appear out of nowhere, they can be quite aggravating.
They can be fixed in one of two ways. Either gently and with a flat-head hammer, reinstall the nail in the ceiling or remove it and replace it with drywall screws. In any instance, you’ll need a few tools and supplies, including plaster.
It’s rare for nails to pop, but they happen more frequently along the walls, where a little crown molding would go a long way toward addressing or, at the very least, concealing the problem.
There’s no need to panic if some of them appear in the middle of the ceiling.
What Causes Nail Pops in the First Place?
The wood frame that supports the nail expands and contracts naturally, resulting in nail pops. When the weather warms up, wood appears to grow and expand. On the contrary, when winter arrives, or even when the temperature drops, the wood shrinks.
If one of the screws is pushed away from the wood just a little bit during the expansion, it could push through the sheetrock when the wood shrinks back into place.
Since the screw is no longer stable and holding, it’s best not to just move it back and forget about it for a while. In reality, it will just pop back out at some point, undoing all the hard work you put into filling the hole with plaster.
When it comes to popcorn ceilings, nail pops may be harder to see. Pushing the screw back in will also crush the popcorn look, which makes it even less appealing.
The wooden frame behind your walls will naturally grow and shrink as the seasons change. So if you hear a nail pop here and there, it doesn’t mean anything is wrong with your house. It doesn’t mean that the structure of your house was built badly.
Also, it doesn’t mean that anything is about to fall down.
If you notice a nail or two poking through your ceiling, you’re dealing with one of the hundreds of screws that hold your ceiling to the top structure.
Even if the walls support weight, popping nails in the walls has nothing to do with the frame. In this case, it was all about the sheetrock that was put over the frame. So you shouldn’t worry too much about it, but you should fix it unless you like the way it looks.
Also, it doesn’t mean that anything is about to fall down.
How to Repair Nail Pops in the Ceiling
Actually, it’s not too hard to fix a nail pop in your ceiling. To do it, you’ll need several things before you start.
- Putty knife with a nail puller
- Sandpaper
- Drywall Screws
- Damp Sponge
- The Drywall Joint Compound
- Primer Paint
- Paint
- Stud finder
Even though the nail is trying to pop up through your ceiling, that doesn’t mean that the stud is right there. It is possible that the nail is protruding at an angle or that there are no spaces between the crossing beams where you need to install your new screws.
It’s advisable to bring a stud finder, so you know you’re getting the wood on the opposite side of the drywall when you screw in your drywall screw.
Find the Studs and Screw the Sheetrock In
Choose a spot 6″ away from the nail pop and use a cordless or regular drill to put in your first 1-and-a-half-inch screw.
Then, select another section that is 6″ away from the nail pop and on the opposite side of the first drywall screw.
Put in a second 1-and-a-half-inch drywall screw.
Get Rid of That Nail!
You may now begin removing the nail pop with the help of the two screws you just installed. Scrape away the bulging sheetrock with your scraper to reveal the nail head.
The goal is to remove the nail without destroying the sheetrock while doing so.
A broad scraper with an indentation designed to grasp and pull nails is one of the finest ways of accomplishing this. The less harm the scraper is likely to inflict, the more surface area it has to depend on.
Nail out the stud and sheetrock with the tiniest amount of force possible. Work on your project while the screws holding the sheetrock in place do their thing.
Sand and Scrubbing
In order to fill in the hole, you must first clean the area where you yanked out the nail, especially if you caused any damage.
The harm from removing the nail should be minor as long as you are patient with it (which is not always easy).
Scrape the area with a scraper to remove any large pieces of sheet rock, then use fine-grit sandpaper to smooth it down.
You don’t have to go wild with it, but primer and finish paint enjoy an abrasive surface to attach to, so you don’t want to go overboard.
It’s Time to Fill the Hole
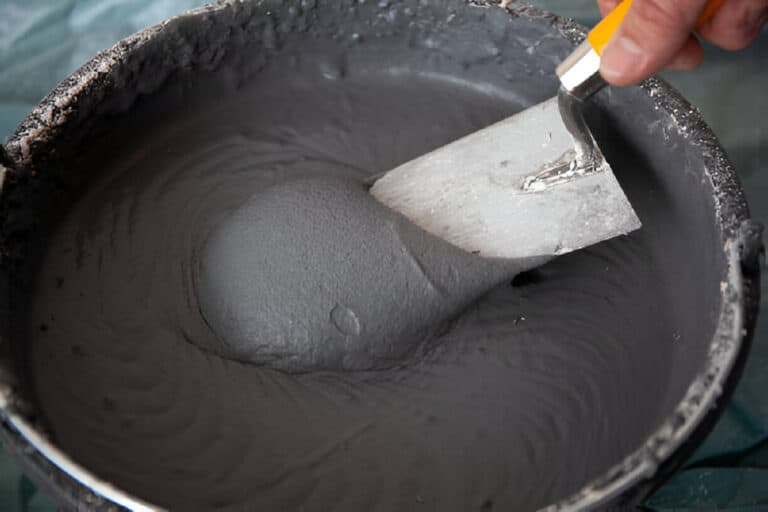
Now it is important to fill up the hole. A simple all-purpose joint compound, available at your local hardware shop or large hardware chains, is all you’ll need for this project. Cover up the hole, and don’t be scared to use a little joint compound liberally.
Once you have all of these, the next step is to prepare the area. Make sure the area is clean and dry before proceeding. Use the damp cloth to wipe down the surface and allow it to dry completely.
Once the surface is dry, it’s time to apply the spackle. Using a putty knife, scoop out a small amount of spackle onto the blade and apply it directly to the nail hole. Make sure to fill the hole completely, and remove any excess spackle with the putty knife. You want the surface to be as smooth as possible. Let the spackle dry completely. Drying times may vary, but it’s best to wait at least 30 minutes.
After the spackle has dried, it’s time to sand it down. Using a sanding block or sandpaper, gently sand down the area until it’s smooth and even with the surrounding ceiling. Be careful not to sand too hard, or you may remove the spackle. Once the surface is smooth, wipe it down with a damp cloth to remove any excess dust or debris.
Paint and Primer
Finally, you can apply a coat of paint or leave the ceiling as is. If you decide to paint, make sure to let the spackle dry completely before painting. And there you have it, a simple and effective way to cover nail holes in your ceiling.
Although white ceilings are common in most homes, prepare for other colors as well. You should be able to get a decent sample of the old paint from Sherwin-Williams, Home Depot, Lowe’s, or any other place. The important thing is to get the right color.
Since it’s only going to be used on a few tiny spots, drywall primer should be perfect since it’s usually rather economical. Pick up a tiny roller handle and a roller nap. Using a paintbrush is always your first choice, although brushes tend to create noticeable patterns.
Allow the primer to cure for a few hours after applying it to the putty area that has been cleaned and dried. Return later with drywall finish paint.
When you buy or match your paint, be sure it matches the color of your primer exactly.
Additional Tools
In the event that your nails are popping often, it may be time to look for solutions that can make your life a little simpler. A Drywall Screw Setter Bit is one of the items that fall into this category.
If you use a setter bit, you don’t have to worry about getting your drywall screws into the sheetrock deep enough or not deep enough.
The setter bit has a Phillips tip inserted in a concave circle. There is a stainless steel circle that wraps around the tip of the Phillips Head. The setter bit will stop you from digging too deep into the sheetrock once the screw head hits it.
To paint popcorn ceilings, use the same procedure as described above, but after priming and painting, you’ll want to do one more thing to improve the look. Put a small amount of the putty in a Ziploc bag or similar container.
Create an icing piping tool by cutting a hole in the corner of the Ziploc bag and using it to pipe on the frosting. Using the piping you produced before, create fresh popcorn designs on the smoothed-over area of the ceiling.
Not great, but better than it would have looked otherwise.
To give your ceilings a more polished look, use a can of popcorn texture spray.
Alternative Ways to Repair Nail Pops from the Ceiling
The methods that we discussed above are the preferred ways to solve the problem of nails popping up on your ceiling. They are the preferred way, but as you look at it, they are not the simplest way by any means.
Below is a simple solution to fix it. Treat them like bandages—just a temporary solution. If none of these solutions work, you can also try using screw hooks instead of nails.
- One way to prevent nails from coming out of the ceiling is to use a hammer with a magnetic head. This will help keep the nails in place while you hammer them in.
- Another way to prevent nails from coming out of the ceiling is to use a nail gun with staples instead of nails. If you do use nails, make sure they are long enough and that the head is slightly above the surface of the wood.
- If you have an unfinished ceiling, you can also put adhesive around the hole where you’re going to put the nail, which will help keep it in place.
How to Prevent Nails Coming Out of Ceiling
The average person doesn’t give much thought to the nails in the ceiling, but when they start coming out, it can be a major problem. Not only are they an eyesore, but they can also be dangerous. If a nail falls from the ceiling, it could potentially hit someone or something below. There are several things you can do to prevent nails from coming out of the ceiling:
- Use a level when installing your nails to ensure they are straight.
- Use a hammer with enough force to drive the nails in completely.
- Avoid using nails that are too long for your project.
- Drive the nails in at a slight angle. This will help them stay in place better.
- Use a nail punch to countersink the nails below the surface of the ceiling.
- Use caulk or spackle to fill in the holes and cover the nails.
Can You Use Toothpaste To Fill Nail Holes?
While toothpaste is often hailed as a quick fix for nail holes, it may not always be the best option. Toothpaste is a temporary fix that can work well for small holes in walls, but it is not recommended for use on ceilings. In fact, using toothpaste on the ceiling may lead to unsightly cracks or discoloration, especially if the toothpaste is not properly mixed or applied.
Toothpaste is not designed to withstand the weight of spackle, which is typically used to fill in larger holes. It is also not a good option for textured ceilings, as it may not adhere properly and can leave behind an uneven surface. While it may be tempting to use toothpaste as a quick fix for nail holes, it is important to remember that it is not a long-term solution.
If you do choose to use toothpaste to fill in nail holes, there are a few things to keep in mind. First, make sure the hole is small enough for toothpaste to effectively cover it. You should also avoid using colored toothpaste, as it may not match the color of your walls or ceiling. Additionally, make sure to mix the toothpaste with something that will help it adhere to the surface, such as baking soda or crushed aspirin.
Alternative Fasteners to Use Instead of Nails in the Ceiling
When it comes to hanging objects from your ceiling, nails are not always the best option. Nails can be difficult to remove, and they can also cause damage to the ceiling if they are not driven in properly. Fortunately, there are several alternative fasteners that can be used instead of nails, each with its own unique benefits.
One popular alternative to nails is a ceiling hook. Ceiling hooks are designed to be screwed directly into the ceiling joist, providing a secure anchor point for hanging objects. They come in a variety of sizes and shapes, making it easy to find the perfect hook for your needs. Ceiling hooks are ideal for hanging lightweight objects such as plants, wind chimes, and light fixtures.
Another option is a toggle bolt. Toggle bolts are a type of anchor that can be used to secure heavy objects to the ceiling. They consist of a bolt and a spring-loaded wing that expand behind the drywall to provide a strong anchor point. Toggle bolts are ideal for hanging heavier items such as ceiling fans, heavy light fixtures, or even chairs.
If you need to hang something that requires a more discreet fastener, consider using adhesive hooks. Adhesive hooks are designed to stick directly to the ceiling or wall, providing a secure anchor point without the need for screws or nails. They come in a variety of sizes and strengths, making it easy to find the right hook for your needs. Adhesive hooks are ideal for hanging lightweight objects such as picture frames or small plants.
How Do You Fix a Screw Pop in the Ceiling?
A screw pop is a frustrating problem that can occur when the drywall screws holding the ceiling in place become loose, causing the drywall to bulge or pop out of place. Not only is it unsightly, but it can also weaken the structure of the ceiling over time. Fortunately, fixing a screw pop is a relatively simple process that can be done with a few basic tools and materials.
The first step in fixing a screw pop is to remove any loose drywall screws or nails. This can be done using a screwdriver or hammer, depending on the type of fastener used. Once the loose fasteners have been removed, inspect the area for any damage or cracks that may have occurred as a result of the screw popping.
Next, fill the damaged area and the holes left by the new screws with lightweight patching compound. Use a flexible putty knife to apply the compound and smooth it out as much as possible. Apply two or three coats, allowing each to dry completely before recoating. This will ensure that the area is filled in properly and that the repaired section of ceiling is smooth and even.
After the patching compound has dried completely, sand the area lightly with fine-grit sandpaper to smooth out any rough spots or bumps. Wipe the area down with a damp cloth to remove any dust or debris before proceeding.
Conclusion
Though it isn’t rocket science to fix nail pops, it is necessary to do so when they are more than just an inconvenience. It’s a good thing to know that the nails you’re removing will be replaced with drywall screws, which will reinforce your sheetrock.

